


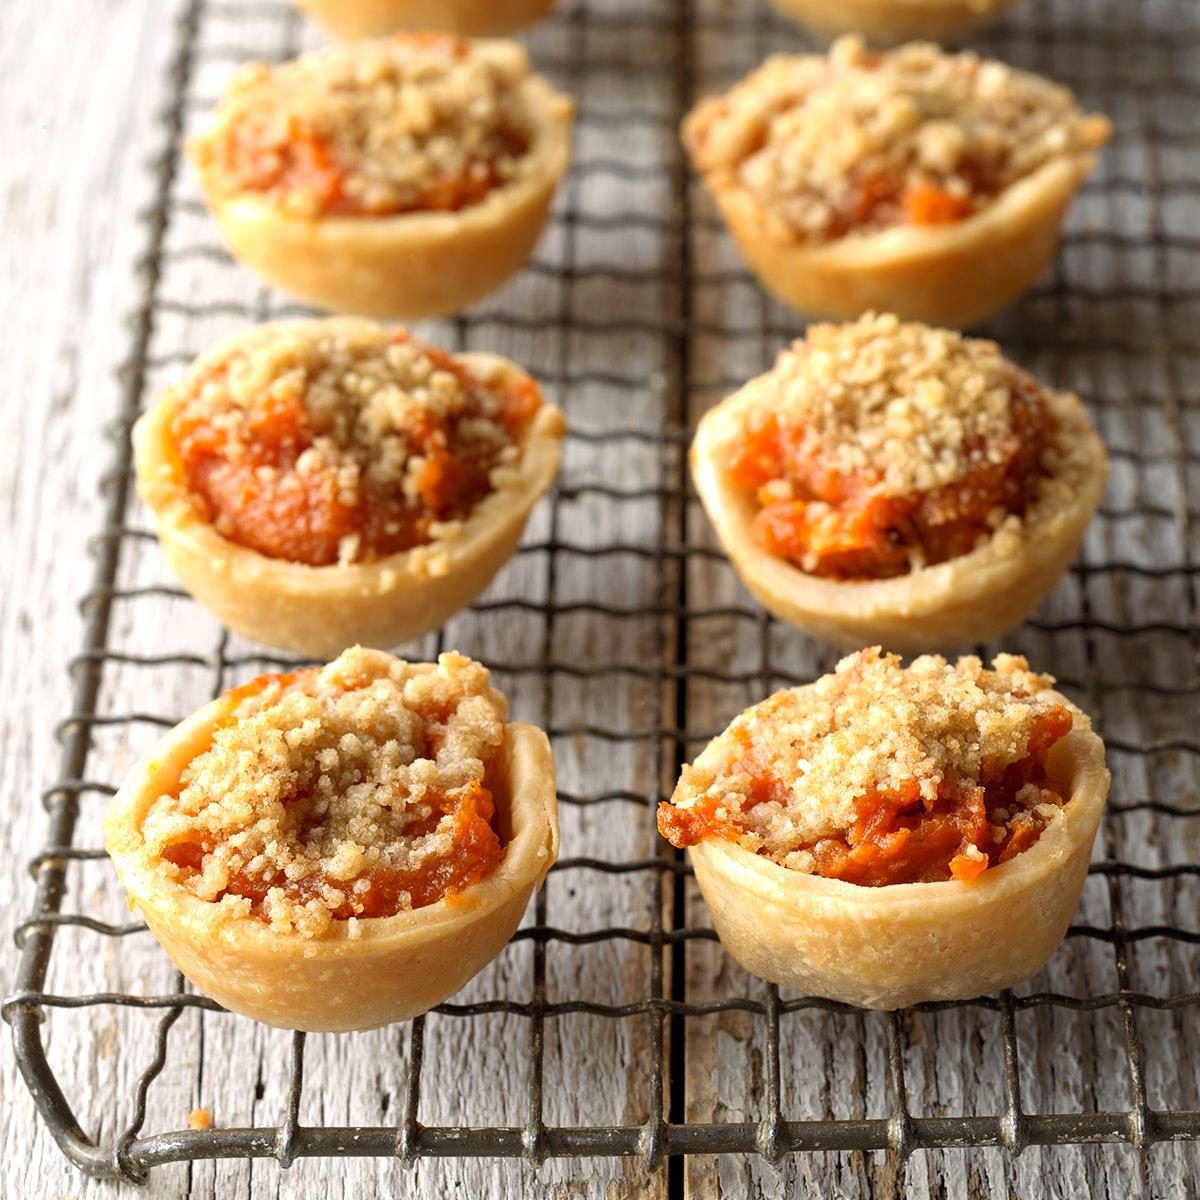

These mini sweet potato pies turn a holiday favorite into bite-sized, single-serving treats with a tender filling and buttery crumb topping.
Pumpkin may be the star of autumn desserts, but why should those gourds have all the fun? There’s another orange-hued seasonal favorite that deserves a spot on your dessert table: sweet potatoes! Not just for ooey-gooey casseroles, these creamy, naturally sweet spuds make the most delightful (and gorgeous) base for festive fall treats.
Our mini sweet potato pies are packed with cozy flavor and baked in a muffin tin to make perfectly portioned size treats that are ideal for dessert buffets, potlucks or holiday parties. Each one has a flaky crust, smooth filling and crisp crumb topping. These handheld pies are sized just right for when you want a little something sweet without committing to a whole slice. And if you’re serving a selection of Thanksgiving desserts, single-serving pies let everyone sample a little bit of everything.
Ingredients for Mini Sweet Potato Pies
- Sweet potatoes: Choose sweet potatoes with bright orange flesh for the prettiest pie filling. Peel and cut them into 3/4-inch cubes so they cook through quickly and evenly.
- Prepared pie crust: Refrigerated or frozen store-bought pie crusts make these mini pies a breeze to assemble, but if you have a favorite homemade dough, use it! Be sure to thaw frozen crusts according to the package instructions so they’re easier to handle.
- All-purpose flour: A small amount of flour helps bind the topping, giving it that ideal crumbly texture. Feel free to swap in whole wheat flour for a bit more fiber and a nuttier flavor.
- Butter: Cold, cubed unsalted butter is key to a perfect crumb topping. Keeping the butter cold ensures it melts slowly in the oven, creating a crisp, buttery finish without becoming greasy.
- Brown sugar: You can use either light or dark brown sugar to sweeten the filling and crumb topping. Use dark brown sugar if you prefer a deeper caramel-like flavor.
Directions
Step 1: Bake the sweet potatoes

Preheat the oven to 400°F. Place the sweet potatoes in a greased 15x10x1-inch baking pan and bake them until they’re tender, 35 to 40 minutes.
Editor’s Tip: Pierce a potato with a fork or paring knife to check for doneness—it should slide in easily.
Step 2: Prep the pie crusts

While the sweet potatoes bake, unroll one pie crust on a lightly floured surface. Using a 2-1/2-inch round cutter, cut out 12 circles. Press the dough circles onto the bottom and up the sides of 12 nonstick mini muffin cups. Repeat the process with the second crust. Pop the muffin pan in the fridge to chill while you make the filling.
Step 3: Make the filling and topping

In a food processor, pulse the flour, butter and 1/4 cup of brown sugar until they become crumbly. Transfer the mixture to a clean bowl and set it aside to use as a topping for the mini pies.

Add the baked sweet potatoes and the remaining 3/4 cup of brown sugar to the food processor (no need to clean it first) and pulse until almost they’re smooth.
Step 4: Fill and bake the pies

Reduce the oven temperature to 325°. Spoon the sweet potato filling into each crust-lined muffin cup, filling each three-fourths full. Sprinkle each with the reserved topping. Bake the mini pies until the crusts are golden brown, about 20 to 24 minutes. Cool them in the pan for 5 to 10 minutes before transferring them to a wire rack. Enjoy your mini pies warm or at room temperature.
Editor’s Tip: Use a small offset spatula or butter knife to gently loosen and lift the pies from the muffin tin.

Recipe Variations
- Make a nutty crumb topping: Pulse a handful of pecans, walnuts or almonds into the crumb topping before baking the mini pies for extra crunch and a nutty flavor.
- Top with marshmallows: Skip the crumb topping and sprinkle mini marshmallows on each pie during the last few minutes of baking. Like bite-sized sweet potato casseroles, they’ll puff up and toast to a golden brown.
- Mix in warming spices: Add 1/2 teaspoon of cinnamon and a pinch of nutmeg or ginger to the sweet potato filling for a cozy, festive flavor.
- Add coconut: Stir a few tablespoons of unsweetened shredded coconut into the filling for added texture and tropical flair.
- Go gluten-free: Use a gluten-free pie crust and substitute a 1-to-1 gluten-free flour blend in the topping so everyone, including guests with dietary restrictions, can enjoy these treats.
How to Store Mini Sweet Potato Pies

Since these mini treats don’t contain eggs or dairy, you can store them on the counter or in the refrigerator. Allow the pies to cool completely, then transfer them to an airtight container. They’ll keep at room temperature for up to two days, or in the fridge for up to five days. Enjoy them chilled, or gently warm them either up in the microwave or in a 300° oven for a few minutes.
Can you freeze mini sweet potato pies?
Yes, these mini pies freeze beautifully for longer storage. After baking, let them cool completely, then arrange them in a single layer on a parchment- or waxed paper–lined baking sheet. Freeze them until they’re firm, then transfer them to a freezer-safe bag or container for up to two months. Thaw the pies in the refrigerator and enjoy them chilled or gently reheated.
Can you make mini sweet potato pies ahead of time?
You can fully bake mini sweet potato pies in advance and freeze them to serve later, or get most of the prep work done ahead of time and bake the pies right before serving.
To save time, roast the sweet potatoes, cut out the mini pie crusts, and make the crumb topping and pie filling one to two days in advance. Store the crusts, topping and sweet potato filling in separate containers in the refrigerator, then assemble the pies just before baking them for the freshest texture. Add a few extra minutes to the baking time to ensure they heat through fully.
Mini Sweet Potato Pie Tips

What is the difference between sweet potatoes and yams?
Believe it or not, sweet potatoes and yams are completely different vegetables. They’re often mistaken for the same thing because grocery stores sometimes label sweet potatoes as yams.
Sweet potatoes have smooth, reddish colored skins and naturally sweet, creamy orange flesh. Yams, on the other hand, have rough, brown skin and starchy white flesh. They’re much less sweet and have a drier texture, so make sure you’re reaching for sweet potatoes to give these mini pies their signature flavor and color.
Can you microwave the sweet potatoes?
Yes, you can microwave sweet potatoes instead of baking them. Peel and cut the sweet potatoes into 3/4-inch cubes, then spread them in an even layer in a microwave-safe dish. Add a splash of water and cover the dish loosely with a microwave-safe lid or storage wrap. Microwave them on high for six to eight minutes or until they’re fork-tender, stirring halfway.
Can I use canned sweet potato puree?
Canned sweet potato puree is a convenient shortcut when you’re short on time. You’ll need about 1-1/2 cups of puree for this recipe—enough for roughly 1 tablespoon of filling per mini muffin cup. Be sure to purchase plain sweet potato puree with no spices or sweetener added to control the flavor and sweetness, and drain off any excess liquid.
Ingredients
- 2 large sweet potatoes, peeled and cut into 3/4-inch cubes
- 2 sheets refrigerated pie crust
- 1/4 cup all-purpose flour
- 3 tablespoons cold unsalted butter, cubed
- 1 cup packed brown sugar, divided
Directions
- Preheat oven to 400°. Place sweet potatoes in a greased 15x10x1-in. baking pan; bake until tender, 35-40 minutes.
- Meanwhile, on a work surface, unroll 1 crust. Using a 2-1/2-inch round cutter, cut out 12 circles. Press circles onto bottoms and up sides of 12 nonstick mini muffin cups. Repeat with second crust. Chill until filling is ready.
- In a food processor, pulse flour, butter and 1/4 cup brown sugar until crumbly; set aside for topping. Add baked sweet potatoes and remaining 3/4 cup brown sugar to food processor; pulse until almost smooth. Fill crust-lined cups three-fourths full. Sprinkle with topping.
- Decrease oven setting to 325°. Bake until crusts are golden brown, 20-24 minutes. Cool 5-10 minutes before removing from pan to a wire rack.
Loading Popular in the Community
My son Levi was only 2 years old when he helped me create this delicious recipe, and it was the first time he told me I love you! I’ll always remember making these with him. —Emily Butler, South Williamsport, Pennsylvania
Recipe Creator