


Learn how to proof bread dough the right way with these pro tips from our Test Kitchen. They'll help you achieve a faster, fluffier rise, whether you’re a beginner or seasoned baker.
Raise your hand if you’ve ever hovered over a bowl of bread dough, waiting for it to rise. Those final hours before baking—the proofing step—can make or break your yeast bread recipes. Underproofed dough will yield flat, dense loaves, while too much rise produces excess gas bubbles that can cause your bread to collapse in the oven.
Proofing can feel intimidating, but the process is pretty simple once you know the basics. We chatted with Taste of Home Test Kitchen manager Catherine Ward, an experienced bread baker who offered several handy bread proofing tips. Whether you’re baking your first loaf or want to dial in your existing technique, these expert tips will help you learn how to proof bread dough for perfect results every time.
What is proofing?
Proofing bread dough is the final step in most bread and yeast roll recipes. Some breads go through multiple rises to allow the dough to rest and rise before going into the oven. The first rise is called bulk fermentation, where the dough rests as one large mass. Then, it’s divided, shaped into loaves or rolls and left to rise a second time. This final step is known as proofing (aka second rise or final fermentation).
Both steps are essential. They give the yeast time to work its magic and help the dough develop the flavor, texture and structure that make homemade bread so wonderful.
One more thing: Proofing bread dough and yeast are two different steps. Proofing yeast happens earlier in the process when you mix the yeast with warm water and a little sugar to activate it before adding the remaining dough ingredients.
The Best Ways to Proof Bread Dough
Dough typically needs to proof at warm temperatures (although there is such a thing as cold-proofing dough, which we’ll review in a minute). Whether your kitchen runs chilly or feels warm and cozy, these tried-and-true methods will help you create the ideal environment for your bread dough to rise.
Proof at room temperature

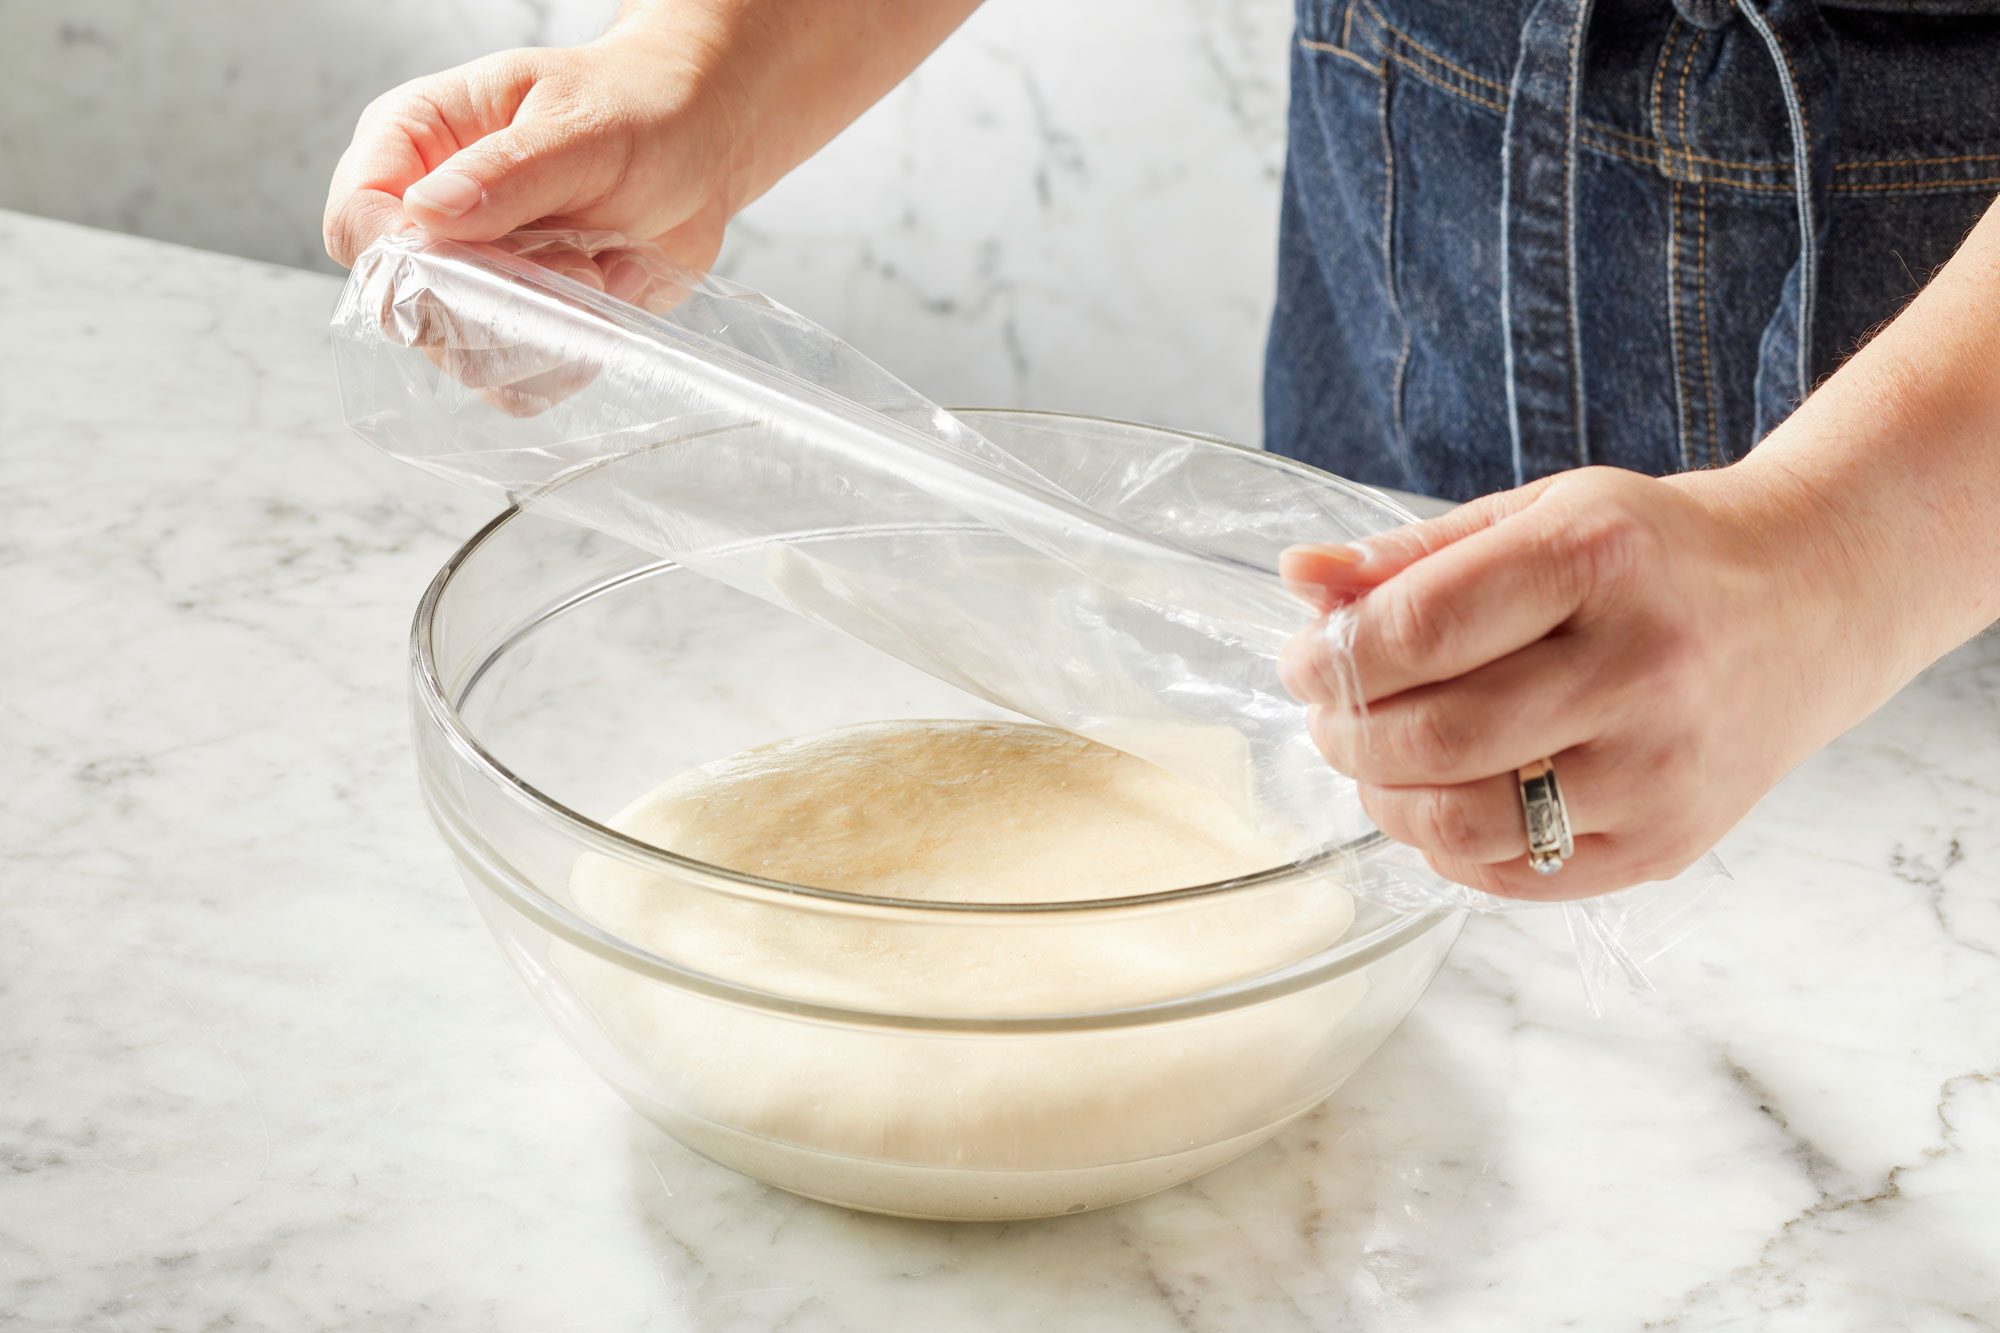
Proofing at room temperature (around 70°F) is our Test Kitchen’s preferred method, especially if your kitchen is free from drafts. The traditional approach is to place your dough in a lightly oiled glass bowl and cover it to prevent the dough’s surface from drying out.
Plastic wrap isn’t the most environmentally friendly choice, but it does an excellent job of trapping moisture inside the bowl, creating a favorable environment for rising. If using cling wrap, rub a tiny bit of oil onto the inside surface to prevent sticking.
According to Catherine, you can also use a slightly damp kitchen towel or plate that fits snugly over the bowl. Natural alternatives like beeswax wrap also work. Just skip damp paper towels—they’ll dry out too quickly to keep the dough moist.
Proof in the oven

Proofing bread in the oven is the way to go if your kitchen feels chilly from wintry weather or air conditioning. Catherine notes that some ovens have a proof setting, which creates the perfect environment for yeast to multiply and dough to rise. But if your oven doesn’t have that setting, no problem! We have an oven light trick that works great in most home kitchens.
To turn your oven into a makeshift proofing box, flip on the oven light and place your covered bowl on the middle or top rack. Most oven lights give off just enough heat to help the dough rise. You can check to be sure using an oven thermometer: If it hits 75° or higher after 30 minutes, you’re in business.
If it’s not quite there, infuse your oven with extra warmth by placing a glass baking dish filled with boiling water on the bottom rack. The gentle steam will create a warm, humid environment that’s just right for proofing. For recipes requiring a longer rise, like chocolate babka, refresh the hot water every 30 to 45 minutes.
Use a proofing box

A proofing box can be a game-changer if you’re serious about bread baking. Investing in one of these handy bread-making tools ensures your dough stays at the ideal temperature and humidity for the whole rise. It also speeds up the process compared to proofing at room temperature, so you can bake perfectly fluffy loaves in less time.
Other Ways to Proof Dough
While we love the oven light trick for proofing, it’s not your only option. If none of the above work for you, try these creative ways to help your dough rise when your kitchen feels a little chilly.
Proofing dough in a slow cooker
To turn your slow cooker into a cozy proofing station, fill it halfway with water and set it to low. The water should heat to around 200°. Put the slow cooker lid on upside down, lay a dishtowel on top and place your bowl on top of the towel. The gentle, radiant heat from the water will help the dough rise.
Proofing dough with a seed germination mat
If you’re an avid gardener with a seed germination mat, you can use it to provide gentle, steady heat to help bread dough rise. Set the temperature to around 80° to encourage a nice, even proof. Layer a dishtowel over the mat, and place your covered bowl on top.
Proofing dough with a heating pad
Some bakers use an electric heating pad to help bread dough rise. However, this isn’t one of our Test Kitchen’s preferred methods. “We don’t recommend proofing on a heating pad, as it can make for an inconsistent rise—overproofed on the bottom and underproofed on the top,” says Catherine.
How to Cold Proof Dough in the Refrigerator
We typically proof dough in a warm environment, but you can do it in the refrigerator if time isn’t a factor. Chilling the dough slows yeast activity, so the rise takes much longer. This method is practical when you want to slow things down. If you don’t have time to bake your dough today, you can let it proof overnight and bake it in the morning.
To cold-proof dough, place it in a covered bowl and let it rise in the fridge for several hours or overnight, depending on your recipe. Catherine recommends cold proofing after the first rise and shaping. Try it the next time you make cinnamon buns or dinner rolls.
If your dough has doubled in size and looks fully proofed, you can bake it straight from the fridge. If it seems underproofed, let it sit at room temperature to finish rising before baking.
Common Bread Proofing Questions
How long does it take to proof dough?
Most bread doughs take one to two hours to proof, depending on the recipe and your kitchen’s temperature. The warmer the environment, the faster the dough will rise. The process can take longer in cooler kitchens, especially during winter. Doughs enriched with eggs, butter and milk (like egg bread or brioche rolls) can also take longer to rise.
What do I do if my bread dough doesn’t rise?
If your bread isn’t rising, check the yeast’s expiration date. If it’s past its prime, it won’t produce the gas bubbles needed for a good rise. Blooming yeast in warm water is the best way to test yeast. If you don’t see bubbles and foam within a few minutes, your yeast is likely inactive, and your dough won’t rise.
If your yeast hasn’t expired, the problem might be water temperature. Yeast needs warm water to activate. Too hot, and the yeast dies; too cold, and it won’t wake up. For best results, use a kitchen thermometer to ensure your water is between 105° and 110° for happy, bubbly yeast.
What type of bowl is best for proofing bread?
A glass bowl is our go-to option for proofing bread. It lets you see the dough as it rises, and glass holds heat well without warming too quickly. Choose one large enough to allow the dough to double in size without spilling over. Ceramic and plastic bowls also work well, but be cautious with metal bowls. Metal is fine for proofing at room temperature, but it can heat up too quickly if you use the oven or a heating pad, leading to uneven or over-proofed dough.
Curious about those pretty proofing baskets called bannetons? They’re a nice gift for bread bakers but are traditionally used for sourdough, not yeasted dough. “A basket doesn’t help dough rise—it just adds a decorative spiral pattern on the finished loaf,” says Catherine. You could certainly use one for yeasted dough, but it’s not necessary.
How do you know when bread is done proofing?
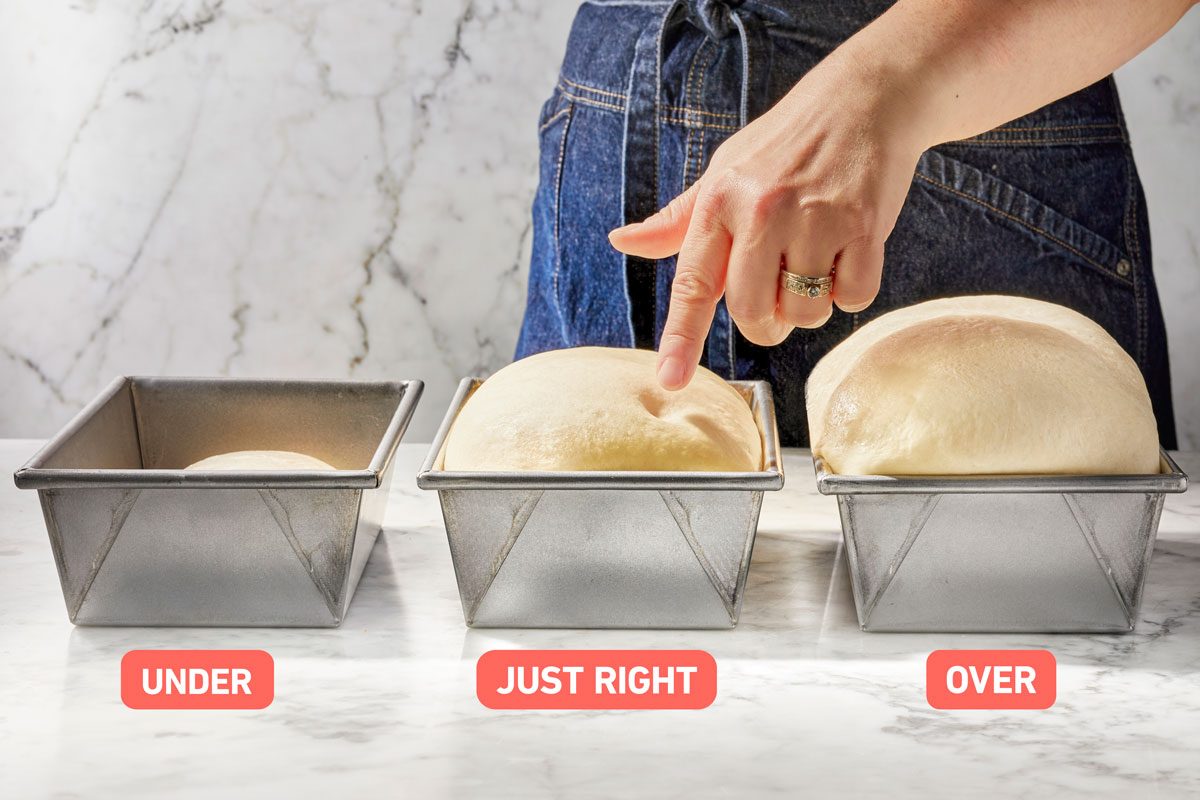
Bread dough is done proofing when it has a puffed appearance and has roughly doubled in size. Catherine recommends marking the dough’s starting point on the outside of the bowl using masking tape or a dry-erase marker. That way, you’ll easily see when it has doubled.
The poke test is another good way to ensure your dough is ready to bake. Gently press a fingertip into the dough. If it springs back slowly, it’s good to go. If it snaps back quickly, it needs more time to rise. And if it doesn’t spring back at all or starts to deflate, it may be overproofed.
How do you make dough rise faster?
If you need to speed up your dough’s final rise and don’t have a proofing box, try proofing your dough in the oven. Place the covered bowl of dough in the oven and turn on the light to create a warm, cozy environment. Set a pan of hot water on the lower rack, and the warm steam will help the yeast work more quickly.
How do you fix overproofed dough?
You can fix overproofed dough by gently punching it down and kneading the dough to release the excess air. Then, reshape it and put it back into the bowl to proof again. To avoid overproofing, Catherine recommends setting a kitchen timer with a little room to spare. “If a recipe suggests a one-hour proof, setting the timer for a 45-minute check is an easy way to avoid hiccups.”
If you get busy and won’t be ready to bake by the time your dough proofs, pop it in the fridge. Chilling is a good way to slow proofing and control the timing between the final rise and baking.
Do you score bread before or after proofing?
You should wait to score bread until after the dough finishes proofing. If you score too early, the cuts can cause your dough to deflate or lose shape. Scoring right before baking gives your bread room to expand as it bakes and ensures it won’t burst open in a random spot.